Photographing Banff's lakes: phone vs camera
What's the single best piece of gear for photographing Banff's turquoise lakes?
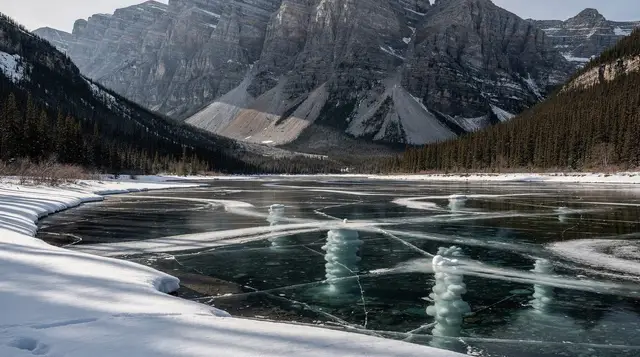
A circular polarizing filter, on a phone clip-on or a camera lens, cuts surface glare and makes the glacial-blue colour read much stronger in photos. It only works once the water has actually turned turquoise, usually from mid-June onward; no filter or edit produces that colour on a lake that's still frozen or running milky grey with early meltwater.
Why most lake photos come out flat
Nearly everyone who visits Lake Louise or Moraine Lake takes the same photo: a wide shot of turquoise water and grey peaks, taken standing at the first spot with a clear view. It’s not a bad instinct, and the colour is real, but the results are often flatter and less interesting than the scene in front of you. Two things are usually to blame — glare sitting on the surface of the water, and a frame with nothing in it besides water and mountains. Both are fixable, and neither requires expensive gear.
This guide covers phone and camera technique that applies across the whole lake cluster — Lake Louise, Moraine Lake, Peyto Lake, Bow Lake, Vermilion Lakes, Lake Minnewanka, Two Jack Lake, and Emerald Lake in Yoho. It won’t repeat the specific sunrise logistics for Moraine Lake, which has its own dedicated guide; the technique here is general and works whenever you’re standing at any of these shorelines with decent light.
The one filter worth packing: a circular polarizer
A circular polarizing filter is a piece of glass that screws onto a camera lens, or clips onto a phone lens, and cuts down glare and reflected light bouncing off non-metallic surfaces — water chief among them. On a calm glacial lake, a surprising amount of what the camera sees is actually reflected sky and haze sitting on top of the water, not the water itself. A polarizer removes much of that reflected layer, which lets the camera register the actual colour of the water underneath: a stronger, more saturated blue-green instead of a pale, washed-out version of it.
For a phone, a clip-on polarizing filter costs relatively little and takes seconds to attach; rotate it while looking at the live preview until the glare visibly drops away and the water darkens and saturates. For a camera with interchangeable lenses, a screw-in circular polarizer sized to your lens’s filter thread does the same job, and you rotate the filter ring itself rather than the whole lens. Either way, the effect is strongest when the sun is roughly to your side rather than directly behind or in front of you, and it’s easy to overdo — turn it until the water looks its richest, then back off slightly, since a maximally polarized sky can go unnaturally dark.
One honest limitation: a polarizing filter cuts glare on water and reduces haze in the air, but it cannot add colour to water that isn’t producing any. That’s the subject of the next section, because it trips up a meaningful number of early-season visitors.
The trap: no filter fixes a lake before it’s turned turquoise
The turquoise colour at lakes like Lake Louise and Moraine Lake comes from glacial rock flour — extremely fine sediment ground up by moving glacial ice, suspended in meltwater, which scatters light in a way that produces that particular blue-green. Crucially, that colour only exists once enough glacial meltwater has actually entered the lake, which happens well into the year. Read the full mechanism in our guide on why the lakes are turquoise.
These lakes stay frozen or icebound until late spring. Lake Louise typically opens up and starts showing colour from around mid-June; Moraine Lake usually follows a little later, once its access road and shuttle system are also running for the season — see when the lakes thaw for the fuller seasonal picture. Before that, you’re looking at ice, slush, or a lake running clear and dark, sometimes with a milky grey cast as the very first meltwater arrives but before enough rock flour has built up to shift the colour.
No amount of polarizing, no editing preset, and no phone’s automatic colour processing will turn that early-season water turquoise in a photograph, because the colour is a physical property of what’s actually suspended in the water at that moment, not a lighting effect. If you’re planning a trip specifically to photograph turquoise lakes, the practical takeaway is to plan for late June through September, and to treat anything promising guaranteed colour in May as unreliable.
Framing: give the water something to compare itself to
The second common problem with lake photos isn’t light, it’s composition. A wide shot of water and mountains with no other reference point can look like a colour sample rather than a place — the eye has nothing nearby to judge scale or distance against, and the photo reads as flatter than the real view felt.
The fix is a foreground element: something close to the camera, in the bottom third of the frame, that gives the water depth and scale. Reliable options at most Banff-area lakes include:
| Foreground element | Where it works well | What it adds |
|---|---|---|
| Shoreline rocks | Most lakes, especially Lake Louise, Bow Lake, Vermilion Lakes | Texture and a clear sense of near-to-far distance |
| A canoe or kayak | Lake Louise, Moraine Lake, Emerald Lake, Lake Minnewanka | A human-scale reference and a splash of colour against the blue |
| A single lakeside tree or branch | Vermilion Lakes, Two Jack Lake, Peyto Lake viewpoint | Framing on one side of the shot, breaking up an empty sky |
| A section of dock or boathouse | Lake Louise, Moraine Lake, Emerald Lake | A strong horizontal or diagonal line leading into the frame |
Get low and get close to the foreground element rather than shooting it from standing height at a distance — even a rock or a patch of shoreline flowers a metre away from the lens reads as a strong foreground when it’s large in frame and slightly out of focus at the edges. This works the same way on a phone’s main lens as it does on a camera with a wide-angle lens; the principle is distance and scale, not equipment.
For canoe rentals if you want that element in your own photos rather than someone else’s, see our guide on canoeing at Lake Louise and Moraine Lake.
Timing: midday light, not golden hour, for lake colour
Most general landscape advice pushes toward golden hour — the hour or so after sunrise and before sunset, when light is warm, low, and flattering for faces and mountain faces alike. For photographing the colour of these particular lakes, that advice works against you.
Glacial lake colour depends on light penetrating the water and scattering off suspended rock flour, and that effect is strongest when the sun is high overhead, roughly 11 a.m. to 2 p.m. At low sun angles, light skims across the surface rather than into it, and the water tends to read as darker, greyer, or dominated by reflected sky colour instead of its own blue-green. If your goal is the most saturated, most turquoise water in a photograph, midday is genuinely the better window, counterintuitive as that feels next to typical photography advice.
That doesn’t mean early morning and evening are wasted at these lakes. Sunrise and sunset light is still the better choice for photographing the surrounding peaks, for calm, mirror-like reflections before wind picks up later in the day, and for avoiding the crowds that build steadily through the late morning. The realistic approach for a single visit is to pick your priority: arrive early for calm water, soft light on the mountains, and thinner crowds, or come at midday specifically for the strongest water colour, understanding you’ll likely be shooting around more people and harsher overhead light on faces.
For a lake-by-lake breakdown of when crowds are thinnest, see lake crowds and quiet times, and for a wider set of viewpoints worth building a driving day around, see lake viewpoints and scenic drives.
Phone vs camera: what actually changes
| Phone | Camera (DSLR/mirrorless) | |
|---|---|---|
| Polarizing filter | Clip-on, inexpensive, quick to add or remove | Screw-in, matched to lens filter thread |
| Water colour and glare control | Very good with a polarizer attached | Very good, with more control over polarization angle via the filter ring |
| Foreground depth-of-field | Handled automatically or via portrait mode | Full manual control with aperture and lens choice |
| Zoom for compressing distant peaks | Limited, digital zoom loses quality quickly | Strong with a telephoto lens |
| Printable detail and cropping room | Good for screens and social sharing, limited for large prints | Better for large prints or heavy cropping |
| Low light at dusk or blue hour | Struggles without a tripod, more noise | Handles low light better, especially with a tripod |
For the vast majority of one-day visits built around midday lake colour, a phone with a clip-on polarizer and attention to foreground framing gets you most of the way to a camera’s result. Where a dedicated camera still earns its weight is longer telephoto reach for distant peaks, better performance in low dusk light, and more room to crop or print large. If you’re deciding between renting gear and simply working the technique above, technique first is the better return for most trips.
Working with a guide instead of alone
If composition and timing feel like a lot to juggle on a single visit, a guided outing built specifically around photography can shortcut a lot of the trial and error. A guided photo tour through Rockies viewpoints typically times stops for workable light and points out foreground options a first-time visitor might walk past.
For a shoot pitched at classic Banff-area viewpoints specifically, a guided outing timed around Banff’s signature viewpoints covers similar ground with a photography-first itinerary. And for visitors trying to cover several lakes without driving and parking logistics eating the day, a day tour that strings together four of the region’s lakes back to back removes a lot of the planning around access and shuttle timing that otherwise limits how much ground you can cover.
None of these replace the fundamentals above — the polarizer, the foreground, the midday timing — but they solve the logistics problem of reaching several lakes in daylight hours, especially given that Moraine Lake’s access is shuttle-only and self-driving between stops on your own schedule isn’t always practical.
Common mistakes to avoid
- Photographing before the thaw and expecting turquoise. Check seasonal timing before building a trip around lake colour; see when the lakes thaw.
- Shooting straight into low sun without a lens hood or shade, which washes out contrast and can produce lens flare that a polarizer won’t fix.
- Skipping the foreground entirely and shooting only wide water-and-mountain shots, which tend to look repetitive across a whole memory card.
- Over-rotating a polarizing filter until the sky goes unnaturally dark blue-black; back off from the strongest setting slightly.
- Assuming a filter compensates for an out-of-season visit. It doesn’t; the colour has to exist in the water first.
- Ignoring the crowd factor on framing. A slightly longer lens or a lower shooting angle can crop out a busy shoreline without needing to arrive at dawn.
Photographing Banff’s lakes: FAQ
Do I need a polarizing filter to get turquoise water in photos?
You don’t need one, but it makes a real difference. A circular polarizer cuts the glare and sky reflections sitting on the water’s surface, which lets the camera actually record the blue-green colour underneath instead of a hazy mirror image. On lakes like Lake Louise and Moraine Lake, where the water is often dead calm, that surface glare is the main thing standing between an average photo and a good one.
What’s the best time of day to photograph Banff’s lakes?
For the water colour itself, midday, roughly 11 a.m. to 2 p.m., when the sun is high and light penetrates the water instead of skimming across the surface. That’s the opposite of the golden-hour advice you’ll read for portraits and landscapes generally. Early morning and evening light is flattering for mountains and faces, but it tends to flatten glacial lakes into grey or dull green.
Can a polarizing filter or editing fix a lake that hasn’t turned turquoise yet?
No. Before the ice melts out and enough glacial rock flour has washed into the water, usually not before mid-June at Lake Louise and a bit later at Moraine Lake, the colour simply isn’t there to enhance. A polarizer only removes glare from colour that already exists; it can’t invent turquoise on a lake that’s still frozen, half-frozen, or running clear and dark with early runoff.
Does a phone camera work as well as a DSLR or mirrorless camera at these lakes?
For a shareable photo, yes, modern phones handle bright, high-contrast lake scenes well, and a clip-on polarizing filter closes most of the gap with a dedicated camera. Where a larger camera still pulls ahead is in printable detail, low-light range at dusk, and flexibility with lenses for compressing distant peaks. Most visitors are happier investing in a phone filter and a bit of technique than in new gear.
What foreground elements work best at lakes like Lake Louise and Moraine Lake?
Rocks at the shoreline, a canoe pulled up on the water, a lone tree, or a section of dock all work well, because they give the eye something close to compare against the vast, flat water and distant peaks. Without a foreground, wide shots of these lakes tend to look like a colour swatch rather than a place; a few metres of interesting shoreline in the bottom third of the frame usually fixes that.
Do I need a tripod for lake photography in Banff?
Not for midday shooting in normal light, since shutter speeds are fast enough to hand-hold. A tripod earns its weight for early morning, overcast, or blue-hour shots, for long-exposure smoothing of ripples, or for consistent framing if you’re bracketing exposures. For a single-day visit built mainly around midday colour, most people can leave it at the hotel.
How do I avoid crowds in my lake photographs at Banff and Moraine Lake?
Arrive as early as the shuttle or parking system allows, since foot traffic at Lake Louise and Moraine Lake builds steadily from mid-morning through mid-afternoon in July and August. A longer lens compressing a distant, quieter section of shoreline, or a lower angle that keeps people out of frame, also helps on a lakeshore that never fully empties in peak season.
Lake Louise & Moraine Lake tours on GetYourGuide
Verified deep-linked GetYourGuide tours. Book through these links and we earn a small commission at no cost to you.
GetYourGuide does not provide a product photo for this activity — the image shows the meeting point, photographed by us.